Introduction
Want to give your kitchen a fresh new look without tearing everything out or spending a fortune? Upgrading your sink is a great way to improve both style and functionality on a tight budget. Whether you’re aiming to refresh an outdated basin, increase usability, or just add a modern touch, this guide will walk you through how to upgrade your sink on a budget—step-by-step.
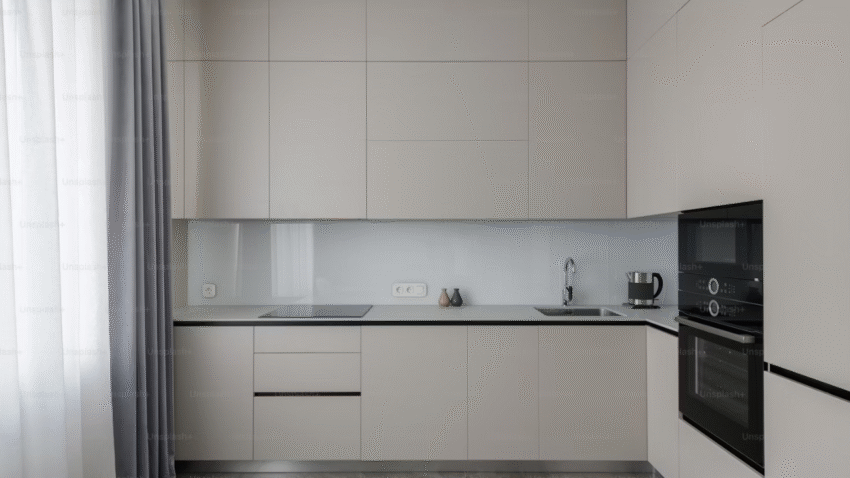
Why Upgrading Your Sink Matters in the Kitchen
Your kitchen sink is one of the most used fixtures in the home—between washing produce, rinsing dishes, and cleaning hands, it plays a vital daily role. Over time, old sinks can become scratched, stained, or inefficient. A simple sink upgrade can:
- Improve water flow and efficiency
- Add modern style and increase home value
- Make cleaning easier with better faucet access or deeper basins
- Create a more hygienic workspace
And you don’t need a full remodel or a big budget to get it done—just a bit of planning, the right tools, and a few smart purchases.
Step-by-Step Guide to Upgrading Your Sink on a Budget
1. Decide What You Want to Upgrade
Before spending a dime, decide if you need a full sink replacement or if you can get by with affordable updates, like:
- Replacing the faucet
- Adding a sink grid or basin rack
- Resealing or re-caulking the area
- Installing a spray hose or water filter
- Painting or refinishing the cabinet under the sink
If your sink is still functional, upgrading just the faucet or accessories can make a big difference for minimal cost.
2. Set a Realistic Budget
Common budget-friendly upgrades include:
- New faucet: $40–$100
- Sink basin: $75–$200
- Sealant/caulk: $5–$10
- Sink accessories (grids, baskets): $10–$30
- Plumbing materials or tools: $20–$50 (if doing it yourself)
Aim to spend under $200–$300 total for a noticeable upgrade. Repurpose what you already have where possible.
3. Shop for Affordable Sinks and Faucets
You don’t need a top-of-the-line model. Look for:
- Discount home improvement stores
- Online clearance outlets like Overstock, Amazon Warehouse, or Wayfair sales
- Salvage yards or Habitat for Humanity ReStores
- Local Facebook Marketplace or Craigslist listings
Focus on stainless steel or composite sinks, which are durable and often cheaper than ceramic or granite.
Budget Tip: A good quality faucet can dramatically change the look of your sink area without replacing the whole basin.
4. Consider DIY Installation
Hiring a plumber can double your costs. If you’re comfortable using basic tools, you can often replace a sink or faucet on your own with a little patience.
Tools you may need:
- Adjustable wrench
- Basin wrench
- Plumber’s tape
- Bucket and towels
- Utility knife
- Caulking gun
- Silicone caulk
Safety Tip: Always turn off the water supply before beginning any plumbing work.
5. Replace the Faucet for Instant Impact
Replacing the faucet is one of the fastest, most affordable upgrades you can do.
Steps:
- Shut off water supply valves under the sink.
- Disconnect water lines from the old faucet.
- Remove the old faucet using a basin wrench.
- Install the new faucet following manufacturer instructions.
- Reconnect water lines, turn valves back on, and test for leaks.
Style Tip: Choose a faucet with a high arc, pull-down sprayer, or brushed metal finish for a modern look.
6. Reseal Around the Sink
If your current sink is surrounded by cracked or moldy caulk, resealing it can freshen the area significantly.
How to Reseal:
- Remove old caulk with a utility knife or scraper.
- Clean the area with rubbing alcohol.
- Apply a new bead of waterproof silicone caulk along the edges.
- Smooth with a caulking tool or damp finger.
- Let dry for 24 hours.
Maintenance Tip: Resealing also prevents leaks and water damage under the counter.
7. Add Budget-Friendly Accessories
You can elevate your sink’s function and appearance with inexpensive extras like:
- Sink grids to protect the basin from scratches
- Over-the-sink cutting boards or roll-up drying racks
- Built-in soap dispensers (many faucets include them)
- Sink caddies for sponges and brushes
- Water-saving aerators to reduce your water bill
These upgrades improve day-to-day use without major expenses.
8. Refresh the Cabinet Underneath
Don’t forget the area beneath the sink. It’s often overlooked, but a quick refresh can make your upgrade feel more complete.
Ideas:
- Paint or line the cabinet with contact paper
- Install pull-out bins or organizers for cleaning supplies
- Add stick-on LED lights for visibility
- Use moisture-proof mats to protect from leaks
Common Mistakes to Avoid
Mistake 1: Not Measuring First
A sink that doesn’t fit your cutout or countertop will cost time and money.
Solution: Measure your current sink and cutout carefully before shopping.
Mistake 2: Ignoring Water Line Compatibility
Some faucets require adapters or different hose sizes.
Solution: Check that your new faucet fits your water supply lines or grab a cheap adapter.
Mistake 3: Forgetting About Drain Alignment
If replacing the entire sink, ensure the drain location lines up with your existing plumbing.
Solution: Choose a sink with a similar configuration to your current one.
Mistake 4: Using the Wrong Caulk
Standard household caulk may not hold up to water.
Solution: Use 100% waterproof silicone caulk designed for kitchens or bathrooms.
Mistake 5: Over-tightening Faucet Connections
Too much force can crack fittings or cause leaks.
Solution: Hand-tighten first, then snug slightly with a wrench.
Extra Tips & Kitchen Hacks
Clean Your Faucet Head
Soak the aerator in vinegar overnight to remove buildup and improve water flow.
Use Contact Paper for a Temporary Sink Surround Upgrade
Peel-and-stick contact paper or waterproof adhesive film can be used around the sink area to give your countertop a temporary facelift.
Paint the Cabinet Hardware
Spray-paint the knobs or handles under your sink for a modern touch that costs less than $10.
Related Task: After upgrading your sink, consider organizing your under-sink storage or adding a backsplash for even more impact on a budget.
Conclusion
Upgrading your kitchen sink doesn’t have to cost a fortune or require a full remodel. With just a few affordable improvements—like replacing the faucet, resealing the edges, or adding helpful accessories—you can transform the heart of your kitchen into a cleaner, more functional, and more attractive space.
One last tip? Start with what bothers you the most—whether it’s a leaky faucet or a scratched basin—and go from there. Bookmark this guide and return whenever you’re ready for your next budget-friendly kitchen project.